


Unlocking the Power of Kubernetes: A Comprehensive Guide to Container Orchestration


Kubernetes is much more then Container Orchestration
It can be run on our own cloud, machine and public cloud providers which can be migrated.
It can also replicate services, scale those services and dedicate them server’s and provides zero downtime deployment, fault tolerance and self healing clusters.
It can also use volumes and provides load balancing for requests we can access logs and services discoveries , we can also stores secret informations like Password and stuff using Secrets.
History of Kubernetes:-
“AWS offers Cloud Services which change everything.”
Kubernetes was originally developed by Google engineers Joe Beda, Brendan Burns, and Craig McLuckie in 2014. It was derived from Google's internal system called Borg, which managed their massive containerised workloads. Google open-sourced Kubernetes in 2014, and it quickly gained traction in the industry due to its ability to automate the deployment, scaling, and management of containerised applications. The Cloud Native Computing Foundation (CNCF) took over the project's governance in 2015. Since then, Kubernetes has become the “de facto” standard for container orchestration, with a vast ecosystem of tools and services built around it.
Docker VS Kubernetes:-
| Feature | Docker | Kubernetes |
| Primary Function | Docker is a platform that uses OS-Level virtualisation to deliver software in packages called containers. | Kubernetes is a container orchestration tool that manages, coordinates and schedules containers at a very big scale. |
| Use Case | Docker is used for creating and running containers. It’s ideal for building microservices and packaging softwares into standardised units. | Kubernetes used for managing and scaling container systems. It’s ideal for coordinating multiple containers, especially in large scale applications. |
| Learning Curve | Docker is relatively easy to learn and use. | Kubernetes has a stepper learning curve due to its extensive features and capabilities. |
| Scalability | Docker can run containers on a Single Machine. | Kubernetes can manage containers across multiple machines, which makes it more suitable for large-scale production. |
Terminology of Kubernetes:-
Kubernetes Cluster:-
Control Plane(which was previously known as Master node but Master is not good inclusive naming convention) + Nodes(which is know as Virtual Machines)
All the Collection of Control Planes and Worker Nodes.

What is KubeCTL?
KubeCTL is Kubernetes CLI (Command Line Interfaces) which will be running onto our terminal like Git, Docker etc.
KubeCTL will communicate with the Control Plane to run an application for eg you’ve 5 application to run to then the control plane will check which worker node is available(empty or handle the load) to run those 5 application for you and it’ll will start the container for you at the free worker node.
We can interact in 2 ways:-
Imperative way = Telling the Cluster with specific commands and stuffs. No file only commands.
Declarative way = Here we create YAML files, in that YAML will specify everything than hand it over to control plane via KubeCTL.
Declarative way is more efficient than Imperative way at the time of scaling
Kubernetes Pod:-
These are the smallest deployable unit or Scheduling unit that can be created to manage in Kubernetes.
Steps to run applications in Kubernetes:-
Create Microservices
Containerise all the Micro-services
Put containers in its own pods
Deploy these pods to controllers
Control Plane in Kubernetes Cluster’s:-
It’s a collection of various components like the kube-apiserver, kube-scheduler , kube-controller-manager and etcd that help us managing the overall Kubernetes Cluster which also manage the communication with the worker nodes.
kube-apiserver: The Kube-api server is the central hub of the Kubernetes Cluster that expose the Kubernetes API. End Users and other cluster components talks to the cluster via API Server. {Port no:- HTTPS/443}etcd: It’s a key-value store of a Cluster. The Cluster State Changes get stored in the etcd.kube-scheduler: When API Server receives a request for Scheduling Pods then the request is passed on to the Scheduler.kube-controller-manager: The kube-controller-manager is responsible for running the controllers that handles the various aspects of the cluster’s control loop.
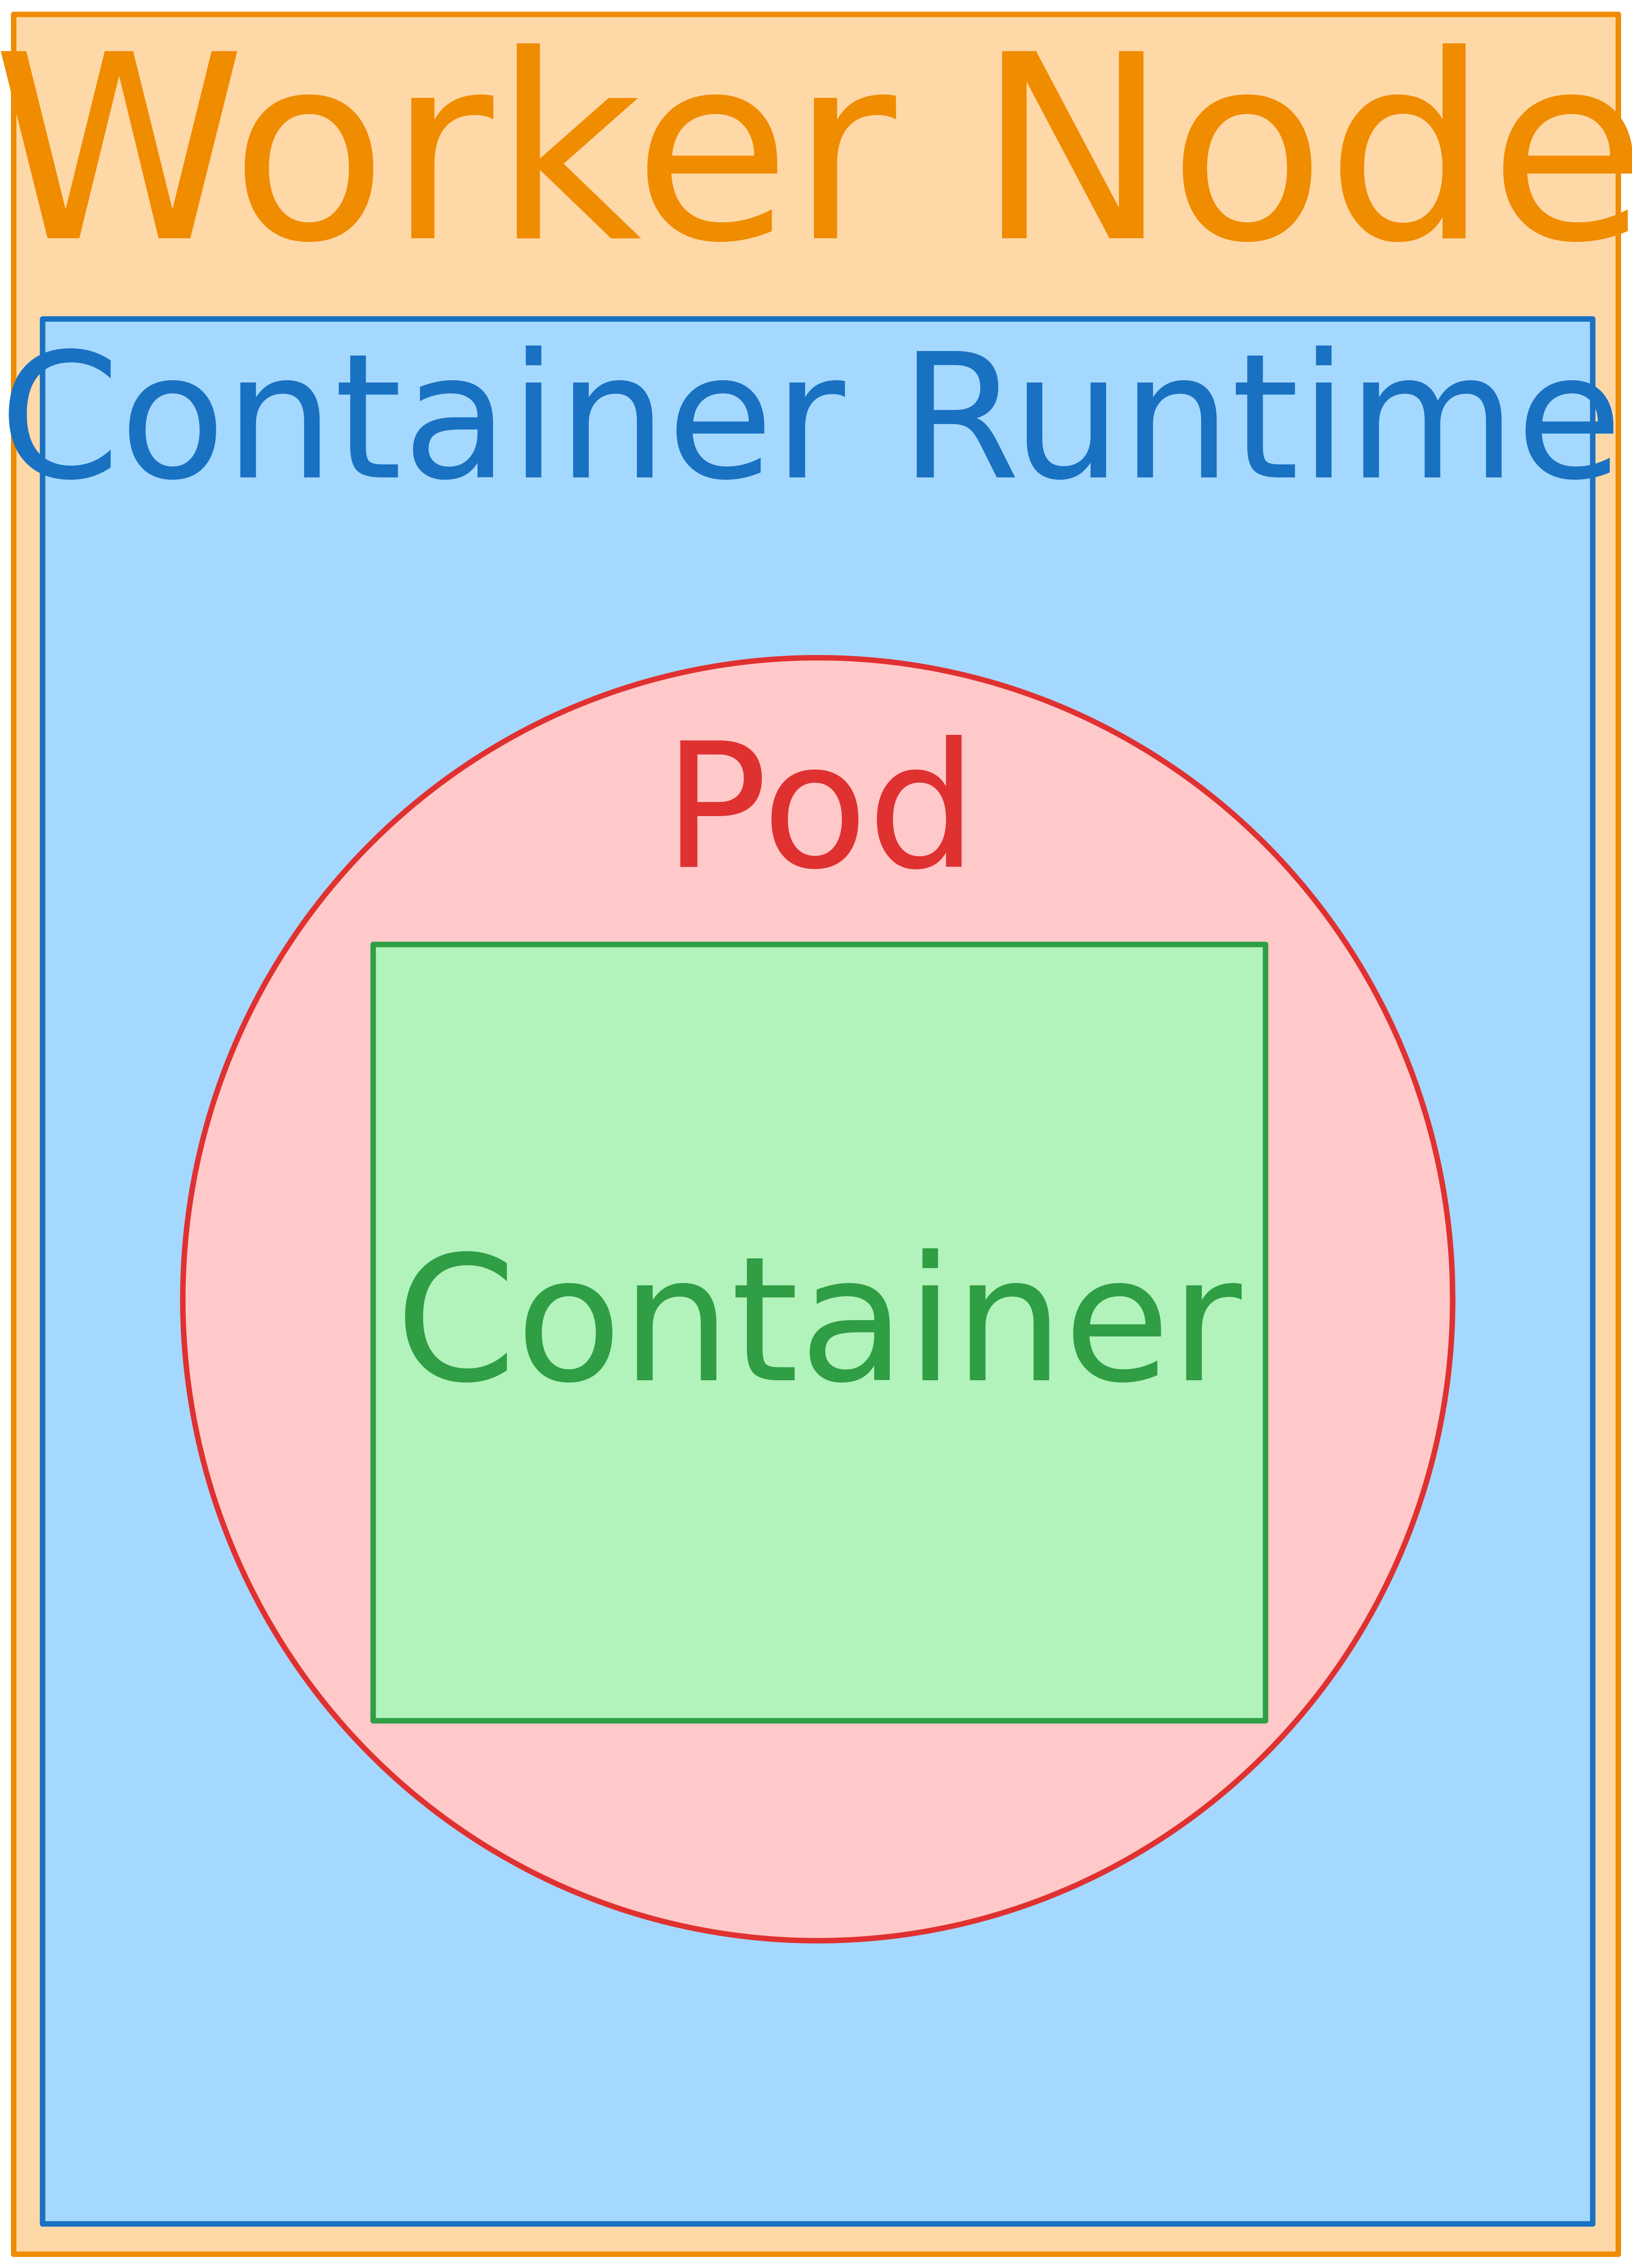
Worker Node in Kubernetes Cluster’s:-
It’s a collection of various components like kubelet , kube-proxy and Container runtime that are responsible for running containerised applications.
kubelet: It’s responsible for all the communications between the Kubernetes control plane and the nodes where the actual workload runs and it works in terms of PodSpec which is a YAML or JSON object that describes a pod.kube-proxy: Monitoring the changes that happen to Service objects and their endpoints and it also helps with Service to pod mapping by maintaining a network routing table that maps Service IP Addresses to the IP Addresses of the pod that belong to the Service.Container runtime: It’s responsible for everything from pulling container images from a registry and managing their life cycle to running the containers on your system.
Kubeconfig File:-
It is a YAML File containing all the cluster information and credential to connect the cluster.
Kube-dns:-
kube-dns is the authoritative name server for the cluster domain (cluster.local) and it resolves external names recursively1.
Short names that are not fully qualified, such as myservice, are completed first with local search paths1.
When you create a cluster, GKE automatically deploys kube-dns pods in the kube-system namespace1.
Pods access the kube-dns deployment through a corresponding Service that groups the kube-dns pods and gives them a single IP address (ClusterIP)1.
By default, all pods in a cluster use this Service to resolve DNS queries1.
Installation:-
Setting up a Kubernetes cluster involves several steps12345. Here’s a high-level overview:
Prerequisites: Ensure that you have a Linux system with root or sudo privileges12345.
Install Docker: Kubernetes requires a container runtime, and Docker is a popular choice12345.
Install kubeadm, kubelet, and kubectl: These are essential tools for setting up a Kubernetes cluster12345.
Create a Kubernetes Cluster: Use kubeadm to create a cluster12345.
Join Nodes to the Cluster: Add worker nodes to the cluster using the kubeadm join command12345.
Test the Cluster: Use kubectl commands to interact with the cluster and ensure it’s working correctly